
Peeling rarely has one cause: the failure may sit at the steel, primer, old coating, or within the chlorinated rubber film itself. A disciplined inspection can identify the failure plane, environmental or preparation error, coating incompatibility, and the repair method before you repaint over an active problem.
Key takeaways
- Lift a loose edge and inspect both faces before removing sound coating.
- Record peeling patterns, steel condition, contamination, dew point, and blast profile.
- Verify dry-film thickness, curing, and compatibility with every underlying coating.
- Repair only after confirming the failure cause and documenting evidence.
Start by locating the failure plane
Do not start by sanding the whole structure. Lift a representative loose edge with a sharp knife, follow the peel until sound coating remains, and inspect both faces of the detached piece.
The coating face and exposed surface will show whether the bond failed at the steel, within the old primer, between coats, or inside the film itself.
Confirm the location with a cross-cut or pull-off test in sound-looking and failed areas. Record where the fracture occurred; a force value without the fracture location cannot identify the cause.
- Steel-to-primer failure: bare steel or primer-free patches appear beneath the detached system. Investigate oil, soluble salts, dust, rust bloom, condensation, and inadequate preparation.
- Primer-to-chlorinated-rubber failure: the primer remains attached to the steel while the topcoat lifts. Check primer condition, surface cleanliness, overcoating interval, and compatibility.
- Failure between chlorinated-rubber coats: one layer stays on the substrate while another separates cleanly. Check recoat timing, surface abrasion, solvent retention, and excessive film thickness.
- Cohesive rupture: the detached coating carries a layer of its own material, or the remaining film is torn rather than cleanly separated. Check softness, trapped solvent, low-temperature drying, high humidity, and chemical exposure.
Mark every test spot on a grid and photograph it with a scale. Note the steel condition, coating layers, dry-film thickness, and exact fracture plane before repairs disturb the evidence.
Read the failure pattern and document the steel
Large sheets lifting from steel point to broad adhesion loss, not a small local defect. Record whether the fracture is at steel-to-primer, primer-to-chlorinated rubber, between chlorinated rubber coats, or within the film; a pull-off value without its fracture location cannot explain the chlorinated rubber coating failure.
- Edge peeling points to weak perimeter preparation, poorly feathered sound coating, or corrosion advancing beneath the edge.
- Blisters usually indicate trapped moisture, soluble salts drawing water through the film, or solvent retained under an over-thick coat.
- Rust jacking reveals active corrosion, rust scale, or pack rust expanding beneath the coating; repainting over it only hides the next failure.
- Cracks indicate a stressed, aged, excessively thick, or mechanically damaged film, with corrosion or steel movement widening the breaks.
- Wrinkles indicate solvent entrapment or a soft film caused by heavy application, low temperature, poor ventilation, or high humidity.
- Bubbles indicate air or moisture trapped during application, or outgassing from porous, warm, or contaminated steel.
- Chalking indicates weathered binder at the surface and a loss of protective film integrity.
- Delamination identifies intercoat adhesion loss, contamination between coats, an exceeded recoat interval, or incompatible old paint.
Map each defect on a grid and photograph it with a scale. Record exposed steel, pits, weld spatter, mill scale, rust grade, defect size, dry-film thickness, and adhesion-test points. Note the exact layer where each test breaks.
Check contamination, dew point, and blast preparation
Before repainting, steel must be clean, dry, and warm enough to prevent condensation. Do not rely on appearance: oil, soluble salts, blast dust, abrasive residue, rust bloom, and trapped moisture can remain on a surface that looks acceptable.
Measure steel temperature, air temperature, relative humidity, and dew point at the work area, then confirm the steel is at least 3 °C above the dew point during preparation and coating. Recheck after weather changes, especially after rain, cooling, or rising humidity.
Check these contamination and preparation points:
- Remove oil and grease with the specified solvent-cleaning method; repainting over them causes adhesion loss.
- Test for soluble salts and compare the result with the coating specification or project limit.
- Remove dust, abrasive residue, loose rust, mill scale, weld spatter, and damaged coating.
- Confirm the blast-cleaned steel meets the specified standard, such as ISO 8501-1 Sa 2½, and measure the surface profile against the product data sheet.
- Stop if condensation, rain, standing water, or residual moisture is present.
| Check | Pass condition | If it fails |
|---|---|---|
| Dew point | Steel is ≥3 °C above dew point | Wait; condensation can cause rapid adhesion loss and underfilm corrosion |
| Soluble salts | Result is below the specified limit | Wash, retest, and dry the steel |
| Blast dust | No visible or transferable dust remains | Vacuum or clean again |
| Surface profile | Profile matches the coating specification | Reblast or adjust the preparation method |
| Weather | No rain exposure or trapped moisture | Protect, dry, and reinspect before applying chlorinated rubber paint |
Verify film thickness, curing, and coating compatibility
A film can look dry while solvent remains trapped beneath its surface. Because chlorinated rubber is thermoplastic, it hardens as solvent leaves rather than through chemical curing. Excessive thickness, poor ventilation, low temperature, or high humidity slows solvent release and leaves a soft film that wrinkles, blisters, imprints, or lifts at the next coat.
This is a common route to chlorinated rubber coating failure after an apparently acceptable application.
Check the application record for:
- Wet-film and dry-film thickness measured with a calibrated magnetic or electromagnetic gauge on the steel; overbuilding is not a harmless safety margin.
- Steel temperature, air temperature, dew point, relative humidity, and ventilation during application and recoat.
- The manufacturer’s minimum and maximum recoat intervals; sealing a solvent-rich layer too soon can trap solvent.
- Batch numbers, product numbers, thinner used, and the actual mixing or thinning instructions.
Do not assume the old coating provides a sound base. Strongly crosslinked epoxy, polyurethane, alkyd, zinc-rich primer, tar-containing material, or an unknown aged layer can reject the topcoat or suffer solvent attack.
Confirm the failure plane at steel-to-primer, primer-to-topcoat, between chlorinated-rubber coats, or within the film, then use the coating maker’s approved primer, tie coat, or small-area compatibility test. Record the fracture location with every adhesion result; the test value alone cannot identify the cause.
Choose a repair method and create an evidence trail
A spot repair is justified only when the surrounding coating is tightly bonded, the failure is local, and the old system is identified as compatible. Remove every loose, lifted, undercut, blistered, and rust-jacked section, not just the visibly bare centre; feather the sound coating edge.
| Method | Remove and prepare | Use when |
|---|---|---|
| Spot repair | Feather sound edges, clean exposed steel to the specified standard, then stripe-coat edges, welds, corners, bolts, pits, and crevices before the full coat | Failure is local and adhesion is sound around it |
| Full removal and recoat | Strip the failed system to the specified boundary, prepare all steel, and rebuild the approved primer and topcoat system | Delamination is widespread, the failure plane is unclear, or the old coating is unknown |
| Tie-coat repair | Remove unsound film, prepare sound coating, and apply the coating maker’s approved tie coat before chlorinated rubber paint | The retained coating is identified but direct overcoating is not approved |
Before abrasive blasting, scraping, or power-tool work, test the old coating for lead, chromates, coal-tar components, and other hazardous materials. Plan containment, worker protection, and waste disposal from the result.
Test the prepared surface for oil, grease, soluble salts, dust, abrasive residue, rust bloom, condensation, and moisture. Record surface standard, steel temperature, air temperature, relative humidity, dew point, and the time of coating.
Record photographs, grid locations, failure-plane findings, adhesion-test fracture locations, and calibrated magnetic or electromagnetic dry-film-thickness readings. Include batch numbers, mixing details, application dates, coats, and repair boundaries.
Pragati Paints & Allied Products can help compare a chlorinated rubber system with an approved primer or tie coat, but compatibility must come from documented testing or the coating maker.
Related product
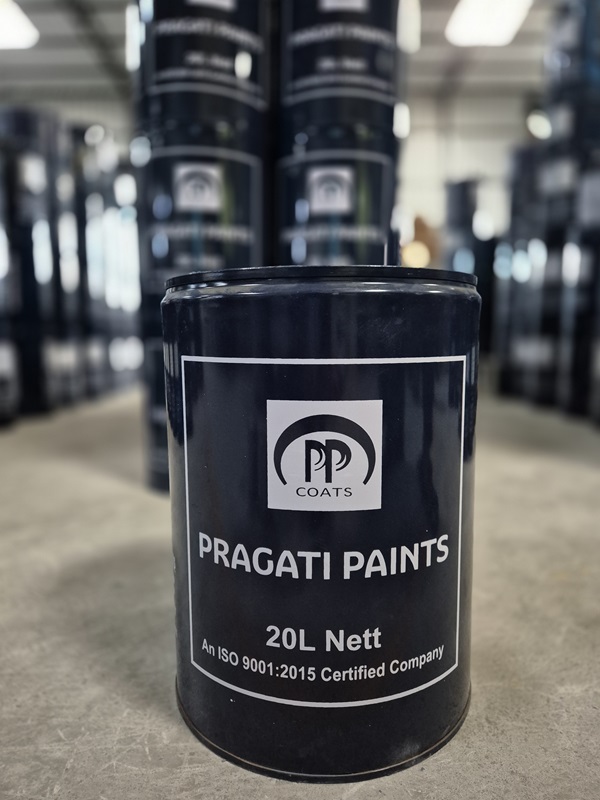 | Q.D. Paints & Primer High-Performance Protective Coating for Industrial & Marine Applications. View product → |
Frequently asked questions
How do you locate the failure plane in peeling chlorinated rubber paint?
Lift a representative loose edge with a sharp knife, follow the peel to sound coating, and inspect both faces of the detached piece.
What should you document when chlorinated rubber paint peels from steel?
Photograph the failure pattern, record the steel condition and coating layers, and note where peeling occurs across the structure.
Which surface conditions should you check before repairing chlorinated rubber coating failure?
Check oil, salts, dust, moisture, dew point, blast cleanliness, and the surface profile before recoating.
What coating checks matter before steel repairs?
Measure dry-film thickness, confirm the existing coating has cured, and verify compatibility between the repair material and underlying layers.