
An etch primer does more than sit between bare metal and paint: its acidic chemistry and controlled film thickness help the next coat grip a properly prepared surface. By following the preparation, application, curing and inspection sequence, you can decide whether an etch primer belongs in your coating system and where a different primer is required.
Key takeaways
- Remove oil, rust and loose oxide before applying etch primer.
- Mix only the quantity usable within the product’s stated pot life.
- Apply thin, even coats and observe the specified recoat and cure times.
- Verify adhesion, film coverage and defects before adding the finish coat.
How does an etch primer create adhesion on metal?
An acidic etch primer creates adhesion through chemistry and texture. Its commonly used phosphoric acid reacts with clean metal oxides, lightly etches the surface and forms a phosphate-rich conversion layer that improves wetting and bonding. Controlled abrasion adds a mechanical key.
This thin film promotes adhesion; it does not fill defects or provide a complete corrosion barrier.
| Option | Main adhesion or protection mechanism | Practical distinction |
|---|---|---|
| Acidic etch primer | Acid reaction with oxides plus slight surface etching | Thin adhesion-promoting coat |
| Conventional epoxy primer | Crosslinked epoxy film and barrier protection | Builds more film and corrosion resistance |
| Zinc-rich primer | Sacrificial zinc protection | Suits specified heavy-duty steel systems |
| Zinc phosphate primer | Epoxy or other binder containing inhibitive pigment | Adds corrosion inhibition without acid etching |
| Direct-to-metal coating | Formulated adhesion to prepared metal | Does not necessarily use an acid conversion step |
The etch primer industrial metal process starts with suitably prepared carbon steel, galvanized steel or aluminium, but each substrate needs its approved treatment. Galvanized steel may need passivation removal and gentle abrasion; aluminium may need oxide removal and controlled abrasion. Strong abrasion can strip zinc.
Do not expect this thin layer to repair:
- Deep pits or severe corrosion
- Loose rust, mill scale or weld spatter
- Sharp edges
- Poorly bonded old paint
Mechanical repair, stripe coating or a compatible high-build primer may be necessary. Choose epoxy, zinc-rich or zinc phosphate primer when corrosion is severe or the specification demands a heavy-duty system. The epoxy paints etch primer steps must follow the technical data sheet: it alone decides whether an epoxy build coat can cover that acid-containing product.
What is the correct etch primer surface preparation sequence?
Begin with a hold-point inspection: identify carbon steel, galvanized steel, aluminium or another non-ferrous substrate, and record existing paint, mill scale, rust, weld spatter and loose coating.
1. Remove oil, grease, cutting fluids, salts and dirt before abrasion. Solvent wiping alone can spread oil across the surface; blasting greasy steel can drive contamination into the abrasive profile.
2. Detergent-clean or solvent-clean exactly as the product specification states, then rinse with clean water, dry completely and inspect again. In an etch primer industrial metal process, water-break testing confirms whether water forms a continuous sheet rather than separating into oily droplets.
3. Prepare carbon steel to the specified grade, not to a vague “clean metal” standard. Examples include ISO 8501-1 Sa 2½ or SSPC-SP 10/NACE No. 2 for abrasive blasting, and ISO St 3 or SSPC-SP 3 for power-tool cleaning. Remove unacceptable rust, mill scale and loose paint; match the profile to the primer’s thickness range.
4. Treat galvanized steel separately. Remove passivation residues and white rust, then use controlled abrasion or sweep blasting without stripping the zinc layer.
5. Remove aluminium oxidation and other non-ferrous surface products with gentler, controlled abrasion; aggressive blasting can gouge the metal or remove protective layers.
6. Before priming, confirm visual cleanliness, assess dust to ISO 8502-3, test soluble salts under ISO 8502-6/9 when specified, and measure profile with replica tape or a stylus method. Remove all remaining dust, then prime immediately after the final inspection.
How should you mix, apply and cure the etch primer?
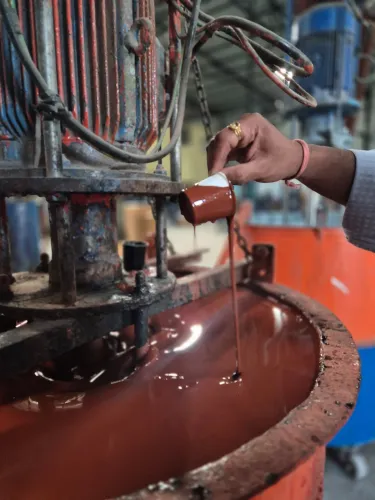
Measure the resin and hardener at the ratio stated on the technical data sheet, then mix until the colour and consistency are uniform. These epoxy paints etch primer steps control cure; observe the listed induction time, record the mixing time, and discard material after its pot life expires.
1. Apply only by spray, brush or roller permitted by the product data sheet. Keep wet-film and dry-film thickness within its stated ranges. Over-application can trap solvent, leaving a soft or brittle film that interferes with the epoxy coat; under-application can leave uncovered metal.
2. Never add extra hardener or thinner to extend working time. That changes the formulation and can cause incomplete cure, poor chemical resistance or adhesion failure. Mixed material also loses pot life faster when warm or stored in a deep container.
3. Before and during application, check steel temperature, air temperature, relative humidity and dew point at the metal surface. Keep steel about 3 °C above dew point when the specification requires it, and follow the product’s humidity and temperature limits.
4. For an epoxy paints etch primer for process in Chennai, control humid coastal air, salt deposition, monsoon delays, overnight exposure, flash rust and condensation. Do not prime steel that changed after preparation: if it develops rust, moisture or contamination, re-clean and re-evaluate it at the hold point.
Cure and recoat only within the stated drying and recoat window.
How does the etch layer become a complete coating system?
The etch coat is normally an adhesion-promoting layer, not the complete corrosion barrier or a gap-filling repair coat. The etch primer industrial metal process adds protective thickness through compatible subsequent coats.
1. Confirm that the etch product’s technical data sheet approves the planned epoxy primer or high-build epoxy above it. Do not assume an acid-containing etch film accepts every epoxy.
2. Apply the compatible epoxy primer or high-build epoxy within its stated thickness range. Use stripe coating on edges and welds where the specified system requires it; the thin etch layer cannot reliably protect these high-risk areas alone.
3. Add an epoxy intermediate coat when the service demands greater barrier thickness, abrasion resistance, immersion resistance or chemical resistance. Epoxy can provide strong barrier performance, but prolonged ultraviolet exposure can make it chalk.
4. Apply a weather-resistant polyurethane topcoat when exterior weathering, gloss or colour retention matters. Choose the complete build-up for immersion, chemical exposure, abrasion, sunlight and appearance—not for the etch coat alone.
5. Treat recoat timing as a compatibility control in the epoxy paints etch primer steps: apply the next coat after the minimum interval and before the maximum interval, once the etch film has flashed off or cured sufficiently.
If the maximum interval passes, follow the product-specific remedy—abrasion, solvent wiping or removal—instead of assuming the next coat will bond.
How do you verify the finished coating and choose the process for Chennai?
Accept the coating only when records, appearance, thickness and specified performance tests agree; one good dry-film reading cannot conceal widespread under-thickness.
- Review batch numbers, resin-to-hardener ratios, application dates, applicators, conditions and recoat records.
- Inspect for runs, dry spray, craters, blistering, missed edges, pinholes and incomplete coverage.
- Measure wet-film thickness during application and dry-film thickness after curing.
- Test continuity, pinholes or adhesion when the project specification requires them.
| Test | What to confirm | Why it matters |
|---|---|---|
| Wet-film thickness | Each coat stays within its specified range | Excess film can trap solvent; thin film can leave gaps |
| Dry-film thickness | Readings cover the full coating system and substrate | Isolated readings cannot hide widespread under-thickness |
| Continuity or adhesion | Pass the specified holiday or pull-off test | Finds defects that appearance alone misses |
Interpret DFT against the substrate, gauge method and total system—not a generic number. Steel profile, zinc or aluminium beneath the film changes the reading and the protection achieved.
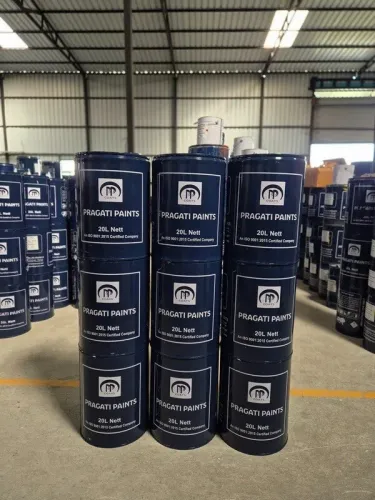
For an epoxy paints etch primer for process in Chennai, ask Pragati Paints & Allied Products for the product technical data sheet, approved substrate list, resin-to-hardener ratio, induction time, pot life, wet- and dry-film limits, recoat window, surface-preparation grade, humidity and temperature limits, and compatible topcoat schedule.
Ask how the process controls salt-laden air, condensation and monsoon interruptions. Require a documented hold-point inspection before priming; re-clean or re-evaluate steel after overnight exposure, flash rust or visible condensation.
Related products
 | Expoxy Paint Etch Primer – The Ultimate Solution for Superior Adhesion on Metal Surfaces When coating smooth, non-porous, or galvanized metal surfaces, achieving... View product → |
 | Expoxy Paint Epoxy Paints –The Ultimate High-Performance Coating for Industrial & Commercial Protection Epoxy paints have become the top choice for industries,... View product → |
Frequently asked questions
How does an etch primer create adhesion on metal?
Phosphoric acid reacts with clean metal oxides, lightly etches the surface and forms a phosphate-rich conversion layer. Abrasion adds a mechanical key for the coating.
What is the correct etch primer surface preparation sequence?
Degrease the metal, remove rust and loose oxide, abrade or blast the surface as specified, remove dust, and apply primer before contamination or flash rust returns.
How should you mix, apply and cure the etch primer?
Follow the product’s stated component ratio, induction time and pot life. Apply the specified thin coat, control recoat timing, and allow full cure before the next layer.
How does the etch layer become a complete coating system?
The etch primer provides adhesion but not complete protection alone. Build the system with compatible primer or epoxy layers and a finish coat selected for exposure and service conditions.
How do you verify the finished coating and choose the process for Chennai?
Check surface cleanliness, dry-film thickness, coverage, adhesion and visible defects. For Chennai, control humidity, condensation, salt contamination and curing conditions before coating.